Design wall 11/21/16 Zig zag and string towers

After deciding to put plain borders on the zig zag quilt, it went pretty fast getting the top completed and ready to quilt. Now my delimma is “panto or custom” for the quilting????? I’ll decide that later.

I’ve been working on another string quilt and finally have it ready to assemble into rows. I’m not real sure about it……..but I used up more strings!!

I call it towers. What do you think?

Anyway, the towers are on my design wall and hopefully I will find time this week to get them sewn together. To see more walls check out www.patchworktimes.com

Theresa

Design wall 11/14/16 gelato zig zag

I got an idea a while back about using EE Schenk’s gelato fabric in a zig zag design. I have a few of the different colors that it comes in, and since I wasn’t sure how it would turn out, I went with one that doesn’t have a big noticeable change in the colors.


I played around with maybe doing a pieced border of some kind, but decided against that idea.


I’m just going to make a simple border and let the colors make a design around the quilt. 

Much faster! Then I can move on to  another project. Maybe I’ll try another zig zag with one of these colors. I think the top one would look good.😀 but for today, that’s what’s on my design wall. Check out more design walls at www.patchworktimes.com

Theresa

My favorite quilt at festival

There were so many beautiful quilts at the Houston festival again this year, but my favorite quilt was this one. This quilt fascinated me.  When I first  looked at the quilt, it looked as if the circles were joined and went together. But they don’t. Each circular design is it’s own circle. Fascinating!  I love the way it fools the eye! Beautiful quilt!!  It didn’t receive a ribbon at the show, but it was an amazing quilt!! The quilt that got viewers choice was amazing too.

Wow! Is all I can say!  

Theresa

Ruby’s Treasures Blog Hop!

Day 3 is my turn to jump into the hop. Each day of the hop Inspired by Fabric will be giving away a FQ bundle, so be sure to go and sign up to follow their blog, either by email or blog reader, and then come back and leave a comment on my blog. I will give away an e-book of my book “Sew, Slice, Spin and Sash” from all the comments.
Ruby Short McKim wrote only one book, 101 Patchwork Patterns and all the patterns are free to download at http://www.101patchworkpatterns.com/
 
It was hard to choose from all the patterns, but I finally chose to make the Dutchmans Puzzle block.

057

It’s made using 8 flying geese (FG) units and my favorite way to make FG is doing the no waste method.

Let’s get started.

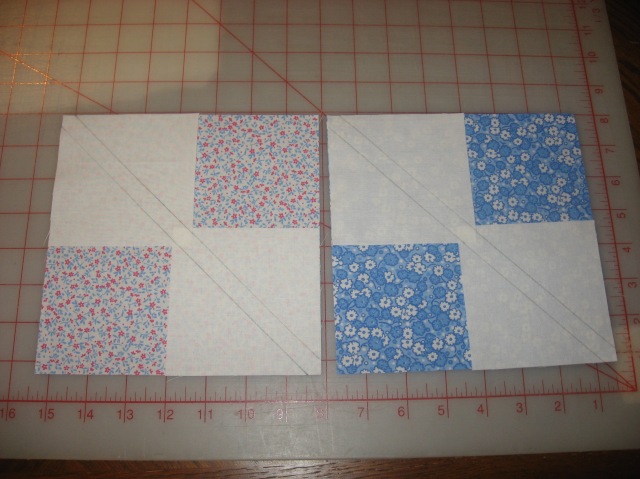
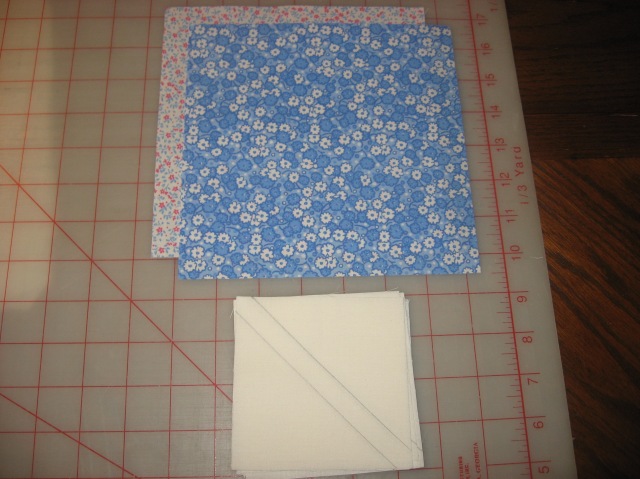
From blue print cut 1-    7 1/4″   x  7 1/4″ square

From the pink and blue print cut 1-    7 1/4″  x  7 1/4″ square

From the background cut 8-  3 7/8″  x    3 7/8″ squares

(oops, I marked the BG squares before taking the picture)

035

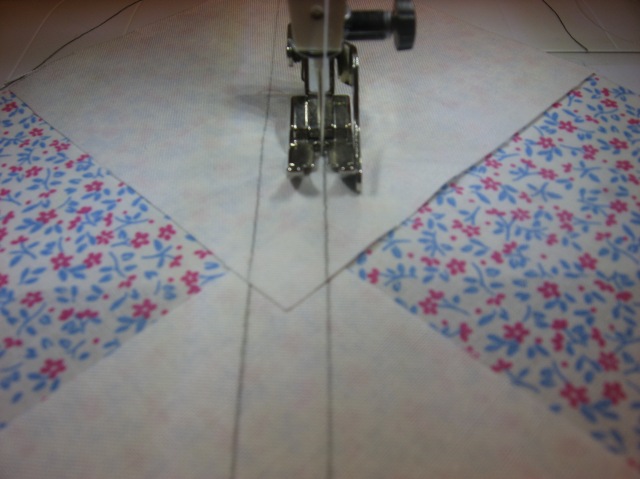
On the background squares, using a mechanical pencil, mark either a diagonal line from corner to corner, or do the double line, like what is shown below.  If you make the single line, sew 1/4″ on both sides of the line.034

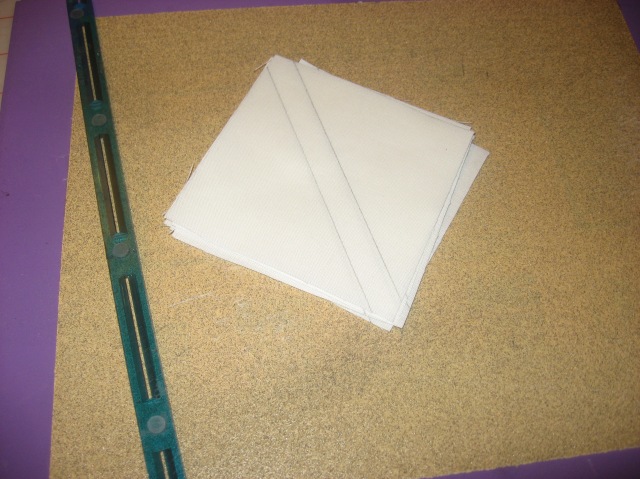
Place two of the background squares onto each of the large squares.
038
Sew just to the side of the marked line.
040
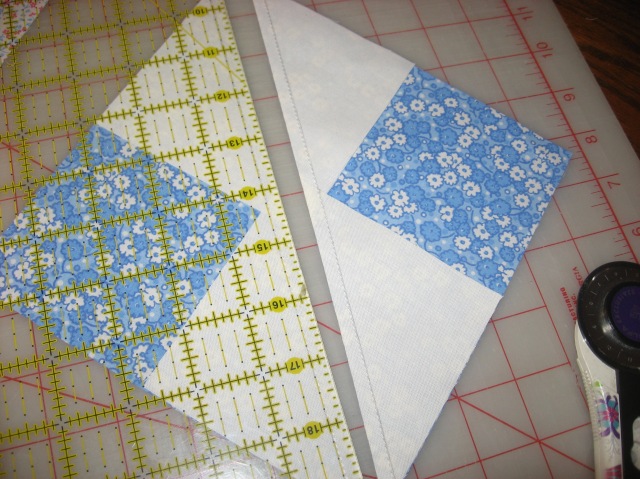
After sewing all 4 lines, cut apart between the sewn lines.
 

042
 Press away from the large triangle.
043
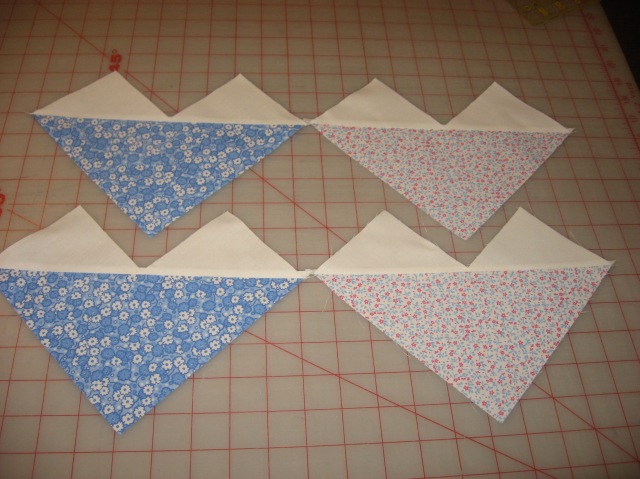
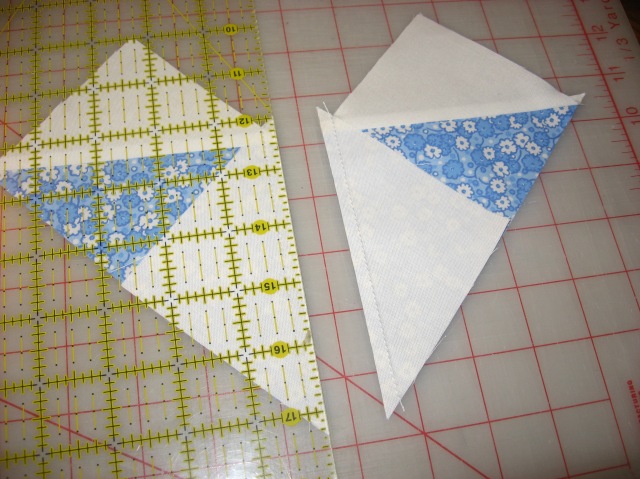
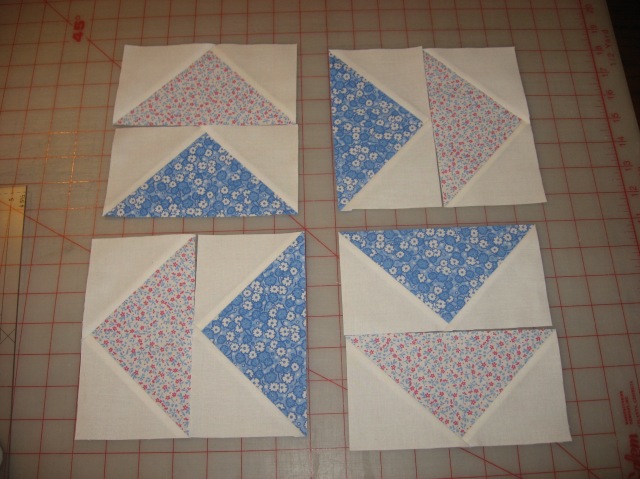
Take the remaining background squares and place on the large triangles.
044
Sew on the drawn lines, cut apart.
045
Press away from the large triangle.
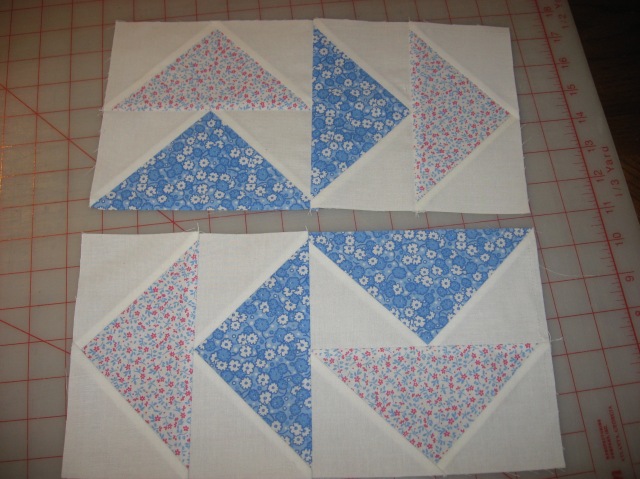
You now have four FQ units of each color.
046
At this point, I like to trim off those little pieces sticking out.
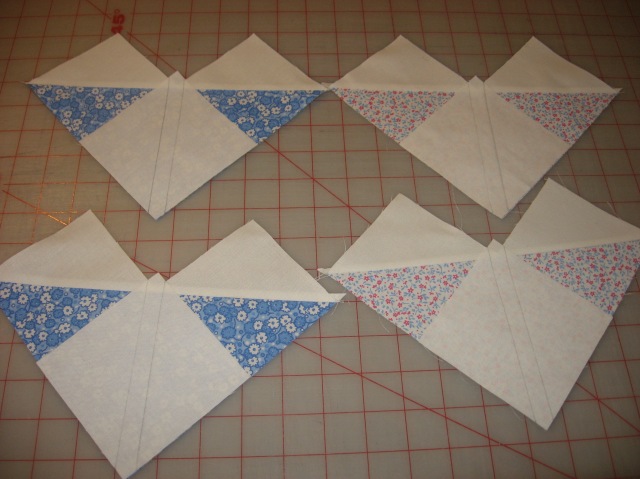
You now have everything ready to sew your block together. Using a dark and a light goose, make 4 blocks with the dark goose on the bottom. Press toward the top goose.048
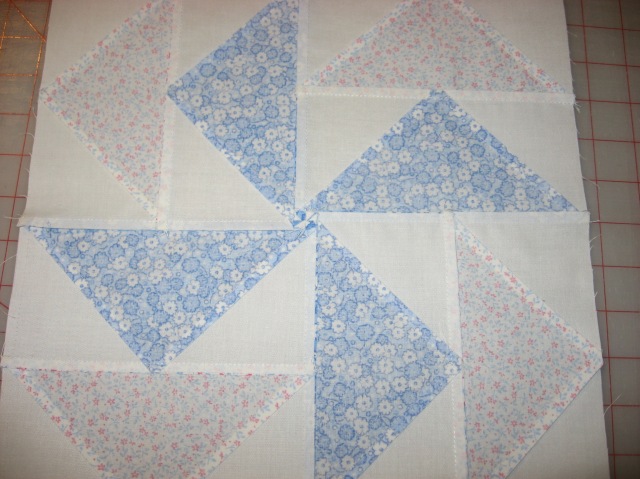
Sew 2 blocks together. Make 2 sets. Press toward the blue goose in the upper right hand square in the picture below.
056
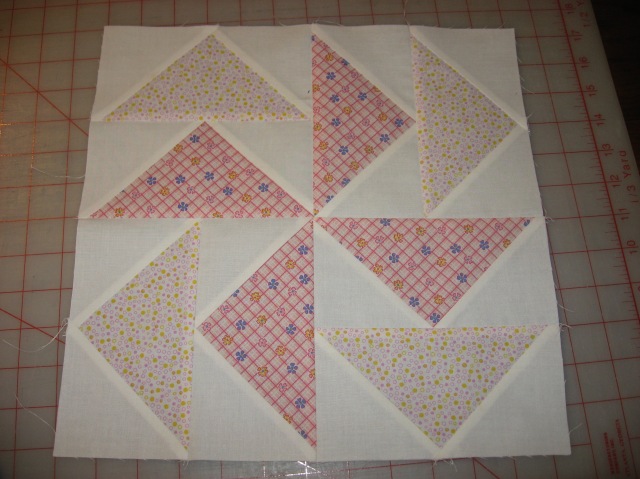
Now sew the two sets together, and your block is done!
057
When pressing the final seam, make the little twist in the center, so that your seams will lay nice and flat.
061
Here’s the other colorway I chose.062
Don’t forget to leave a comment to get in on the drawing.
Have fun hopping!!!Next stop is Pat Speth!
Theresa
—-Blog Hop schedule and blogs—-

Friday 11/4: Barb Eikmeier @Barb’s Favorites

Monday 11/7: Donna Lynn Thomas @DonnaLynnThomasQuilter

Tuesday 11/8:Theresa Ward @AlwaysQuilts

Wednesday 11/9: Pat Speth @NickelQuilts

Thursday 11/10: Reeze Hanson @MorningGloryDesigns

Friday 11/11: Kelly Ashton @KellyQuilter

And here’s the link to Inspired by Fabric, our blog host
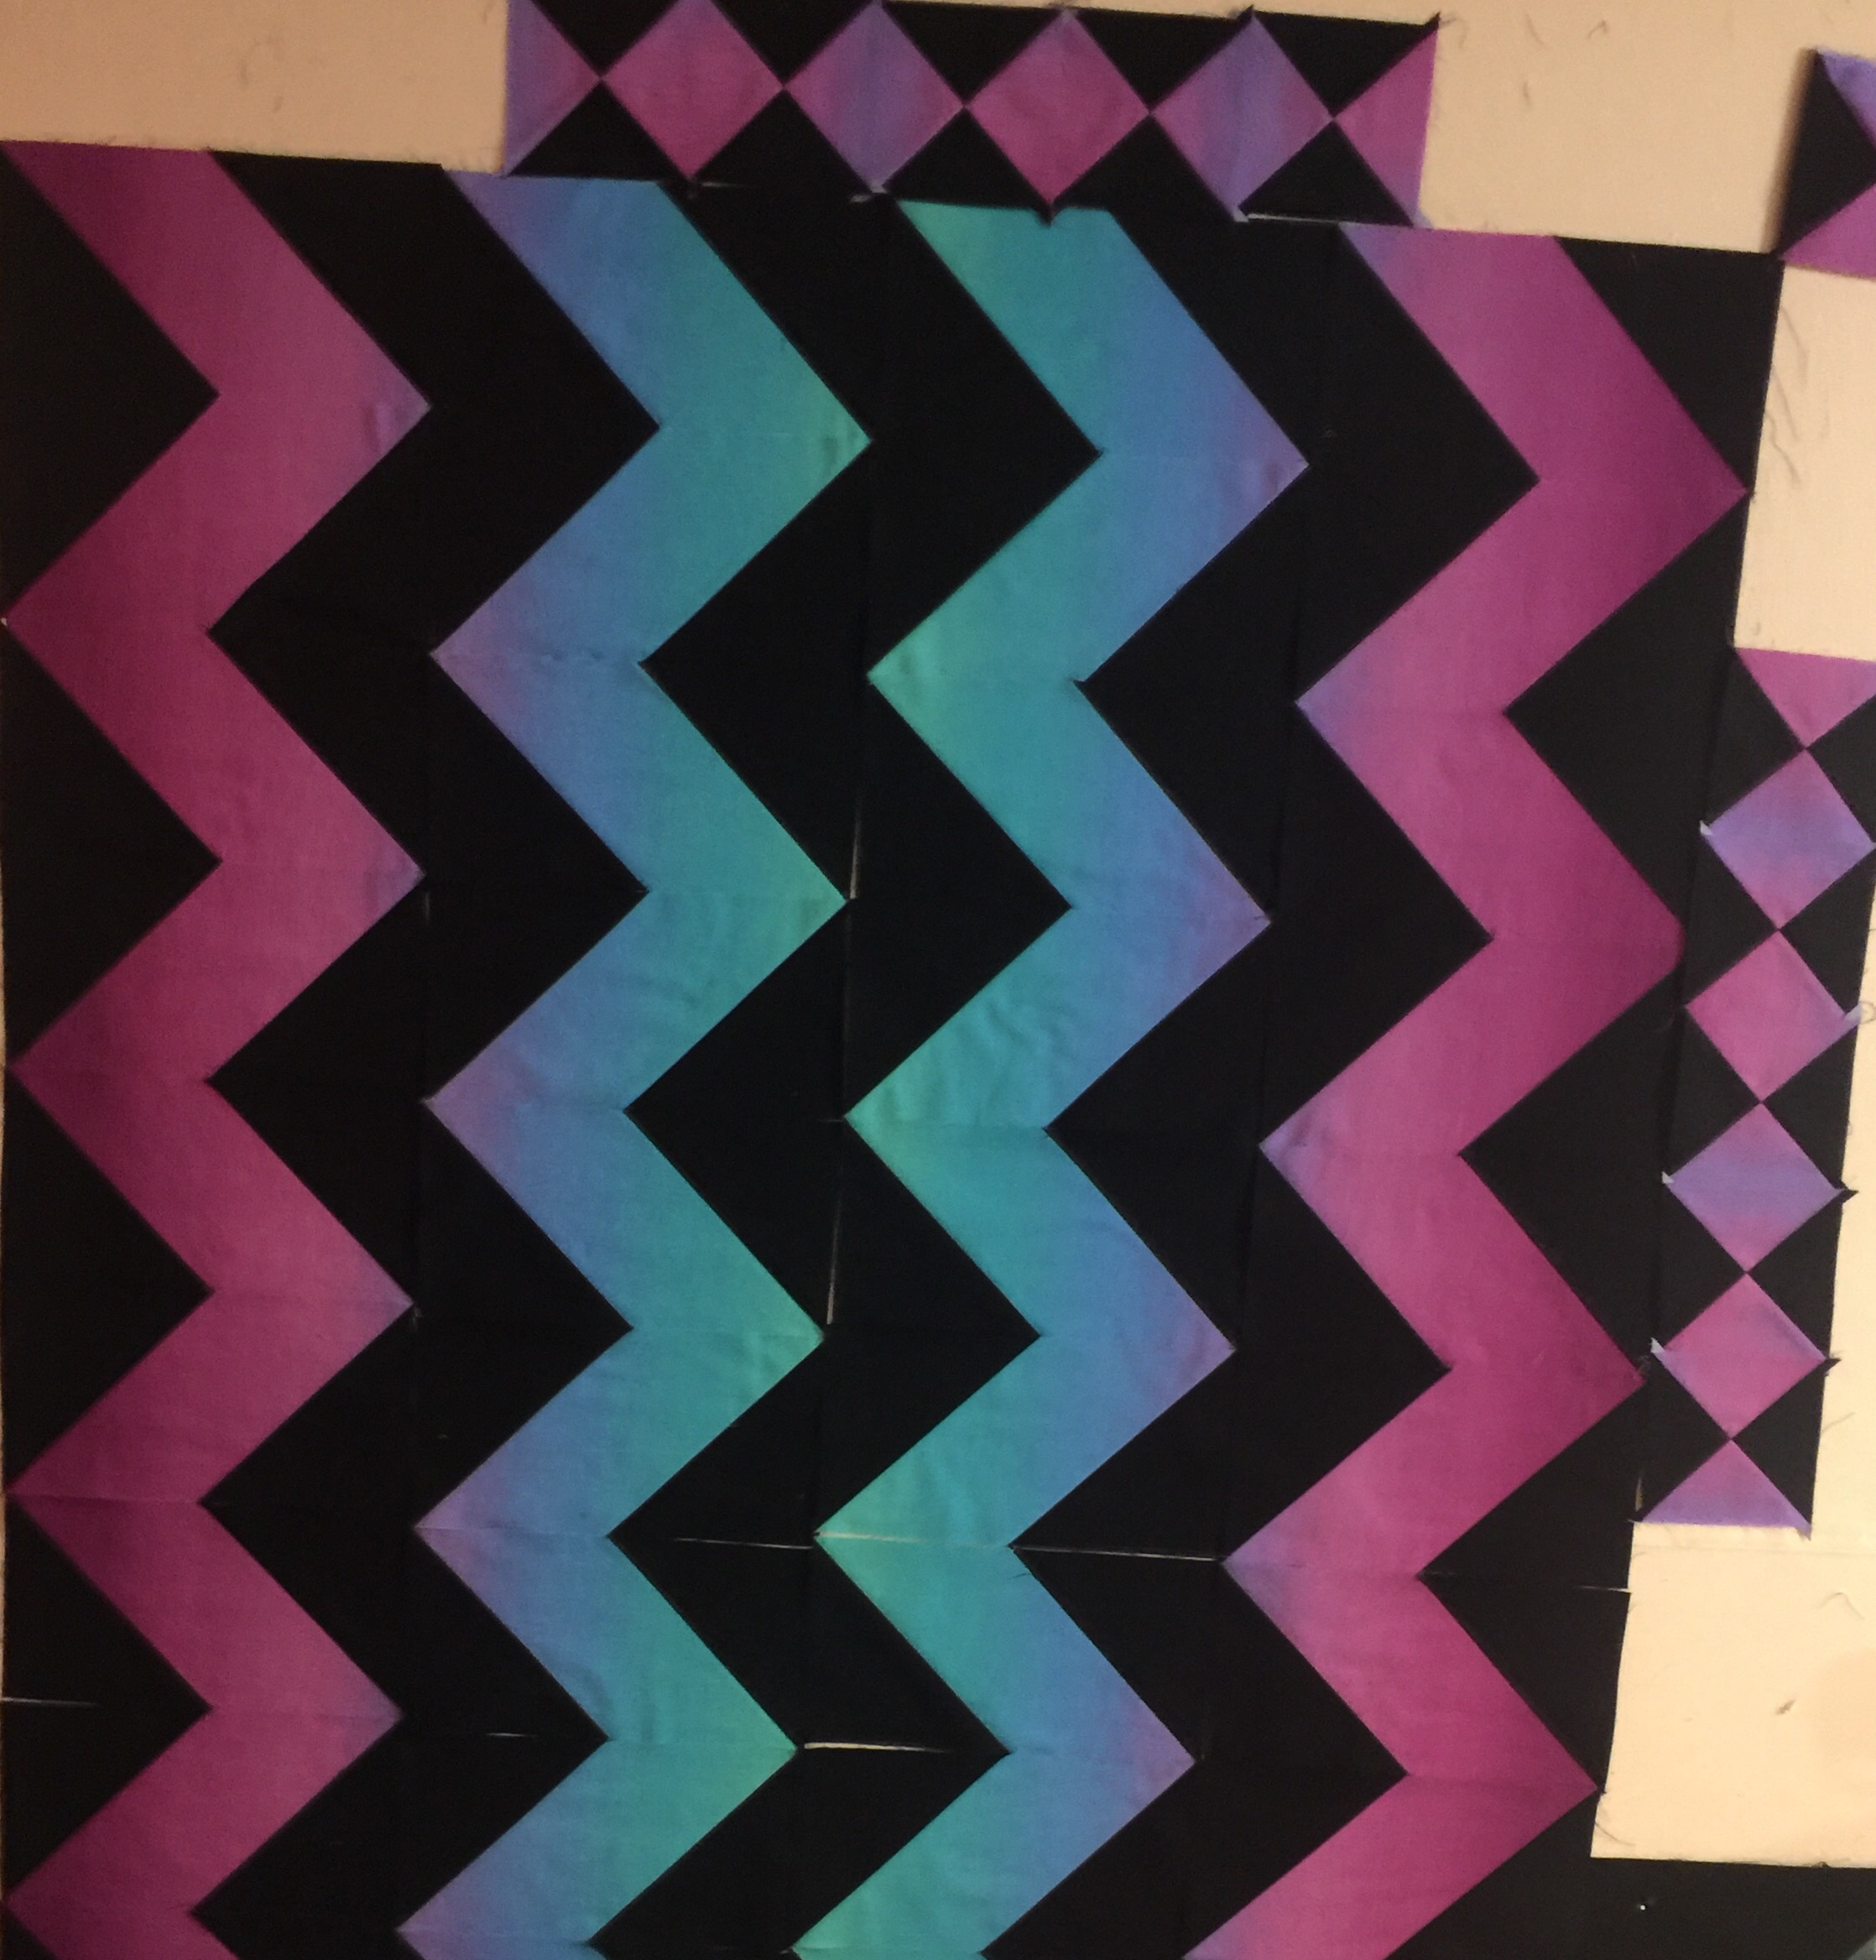
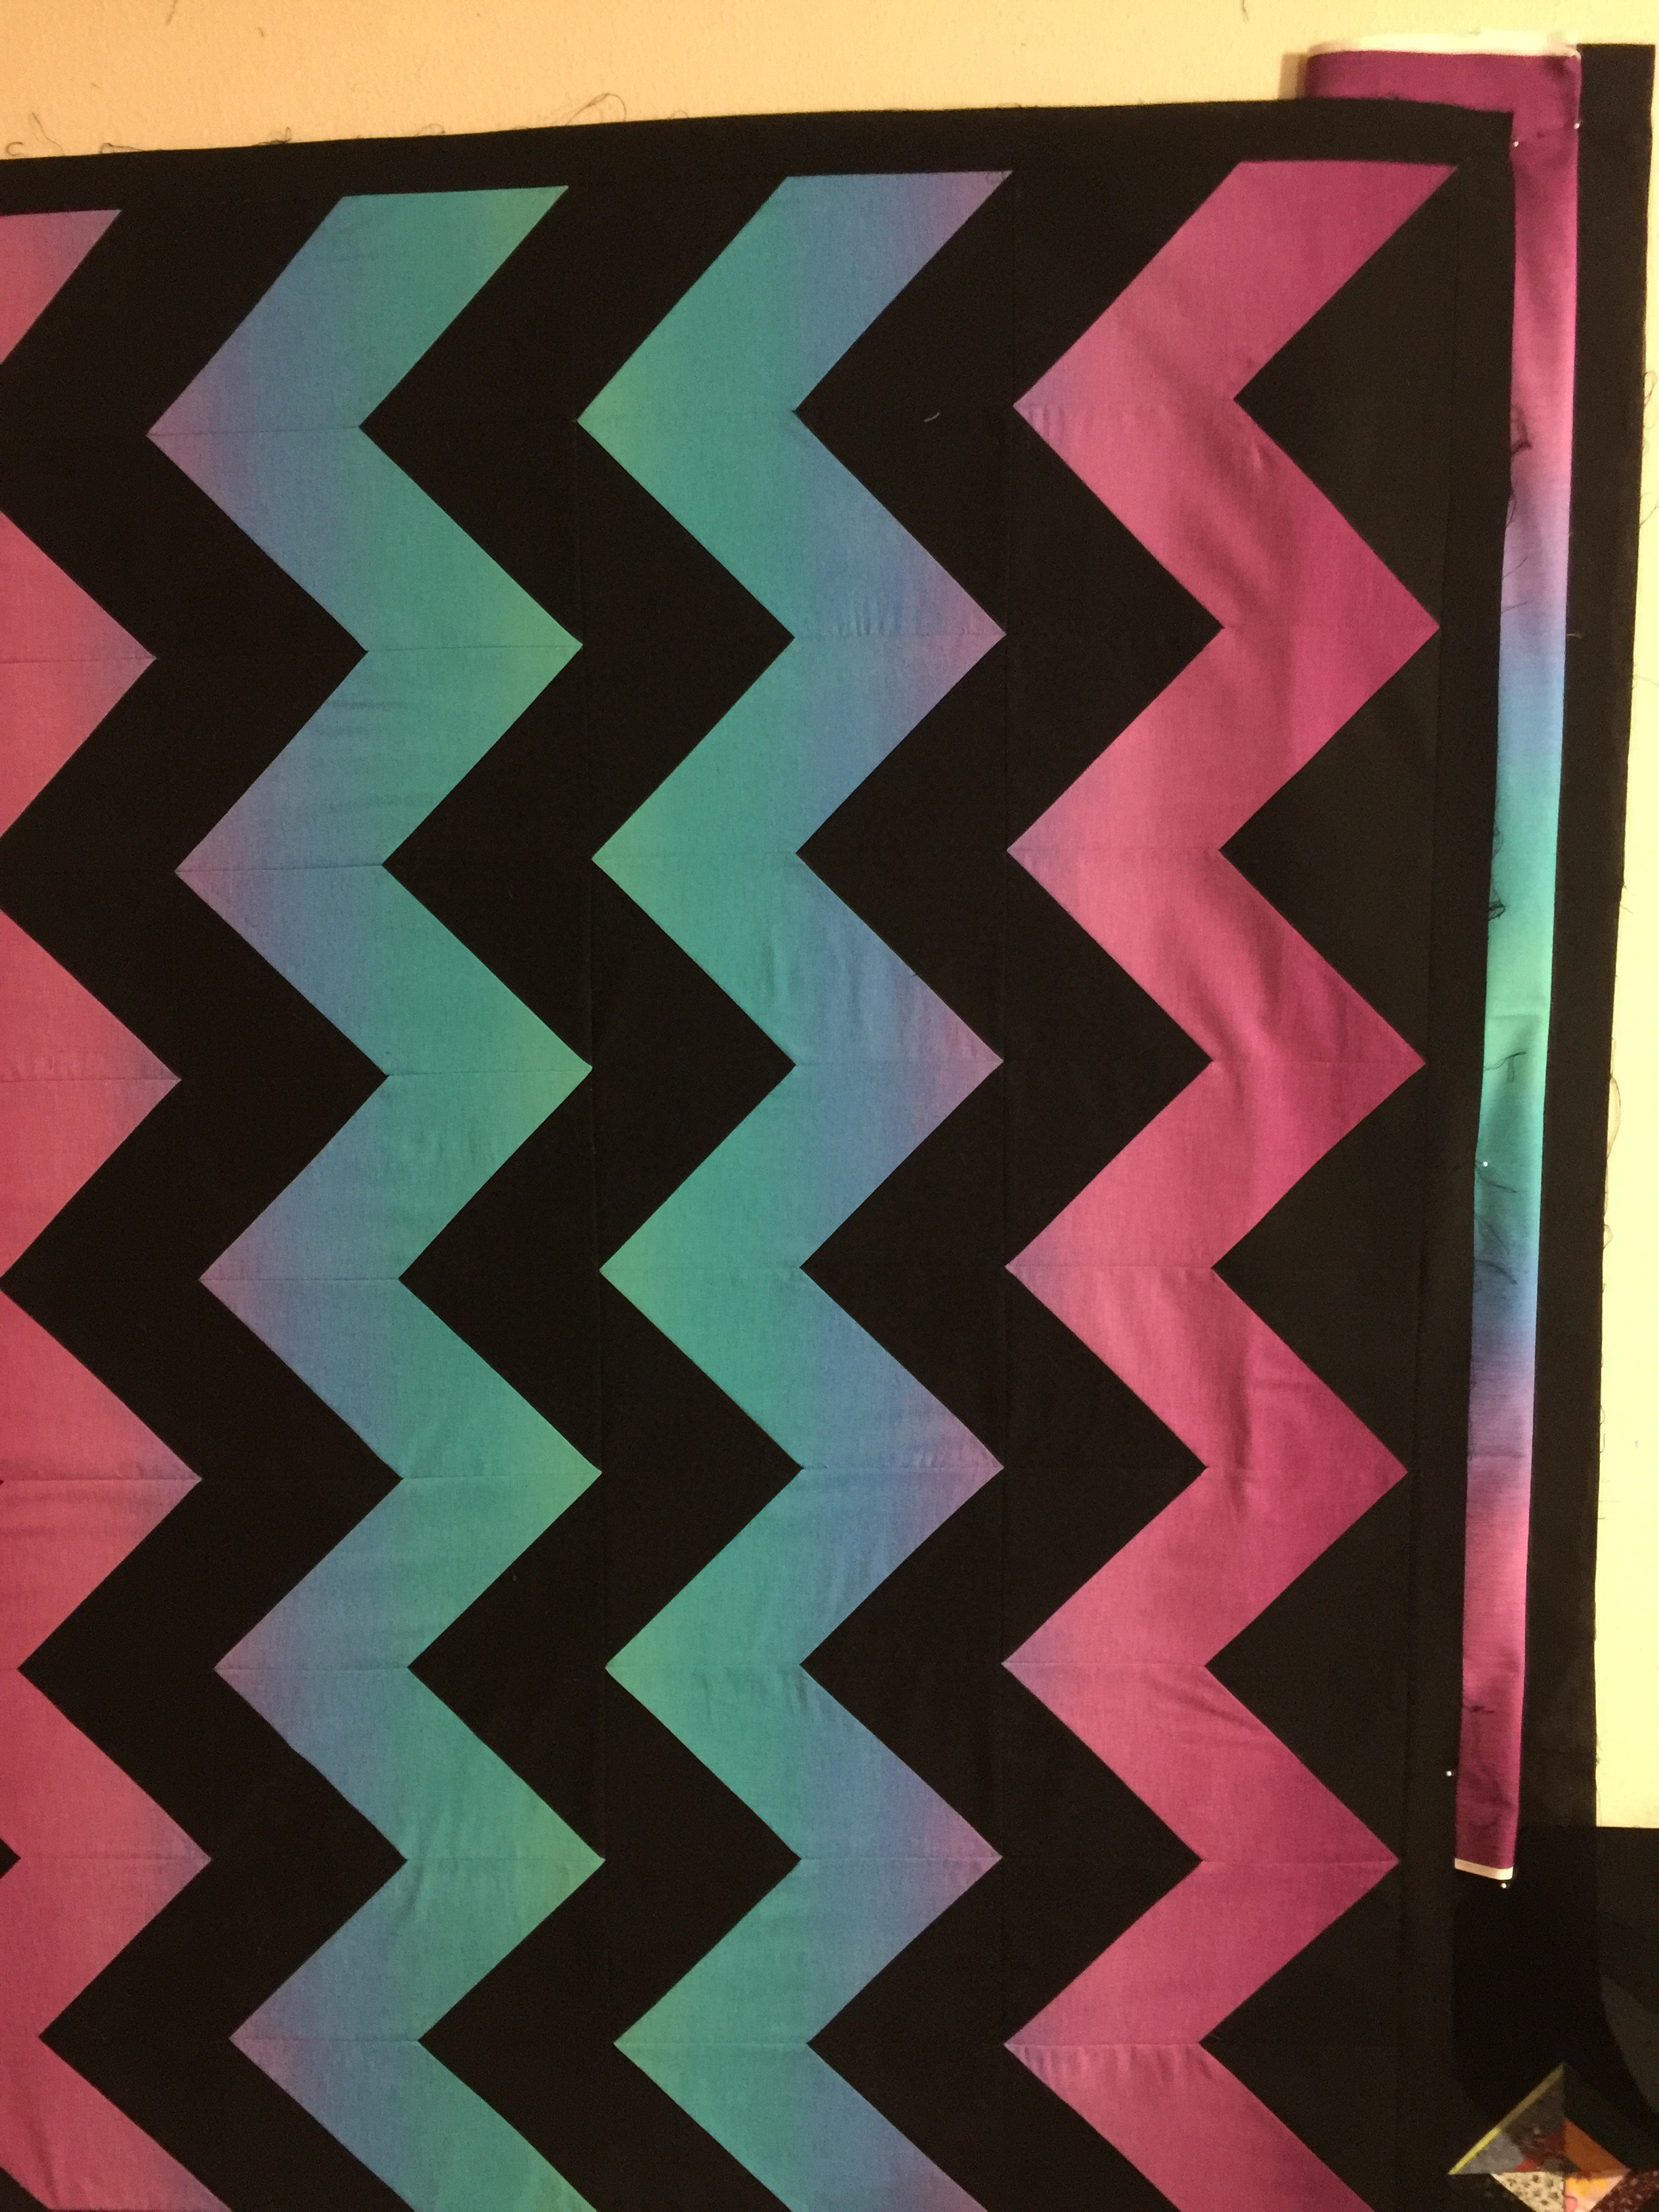
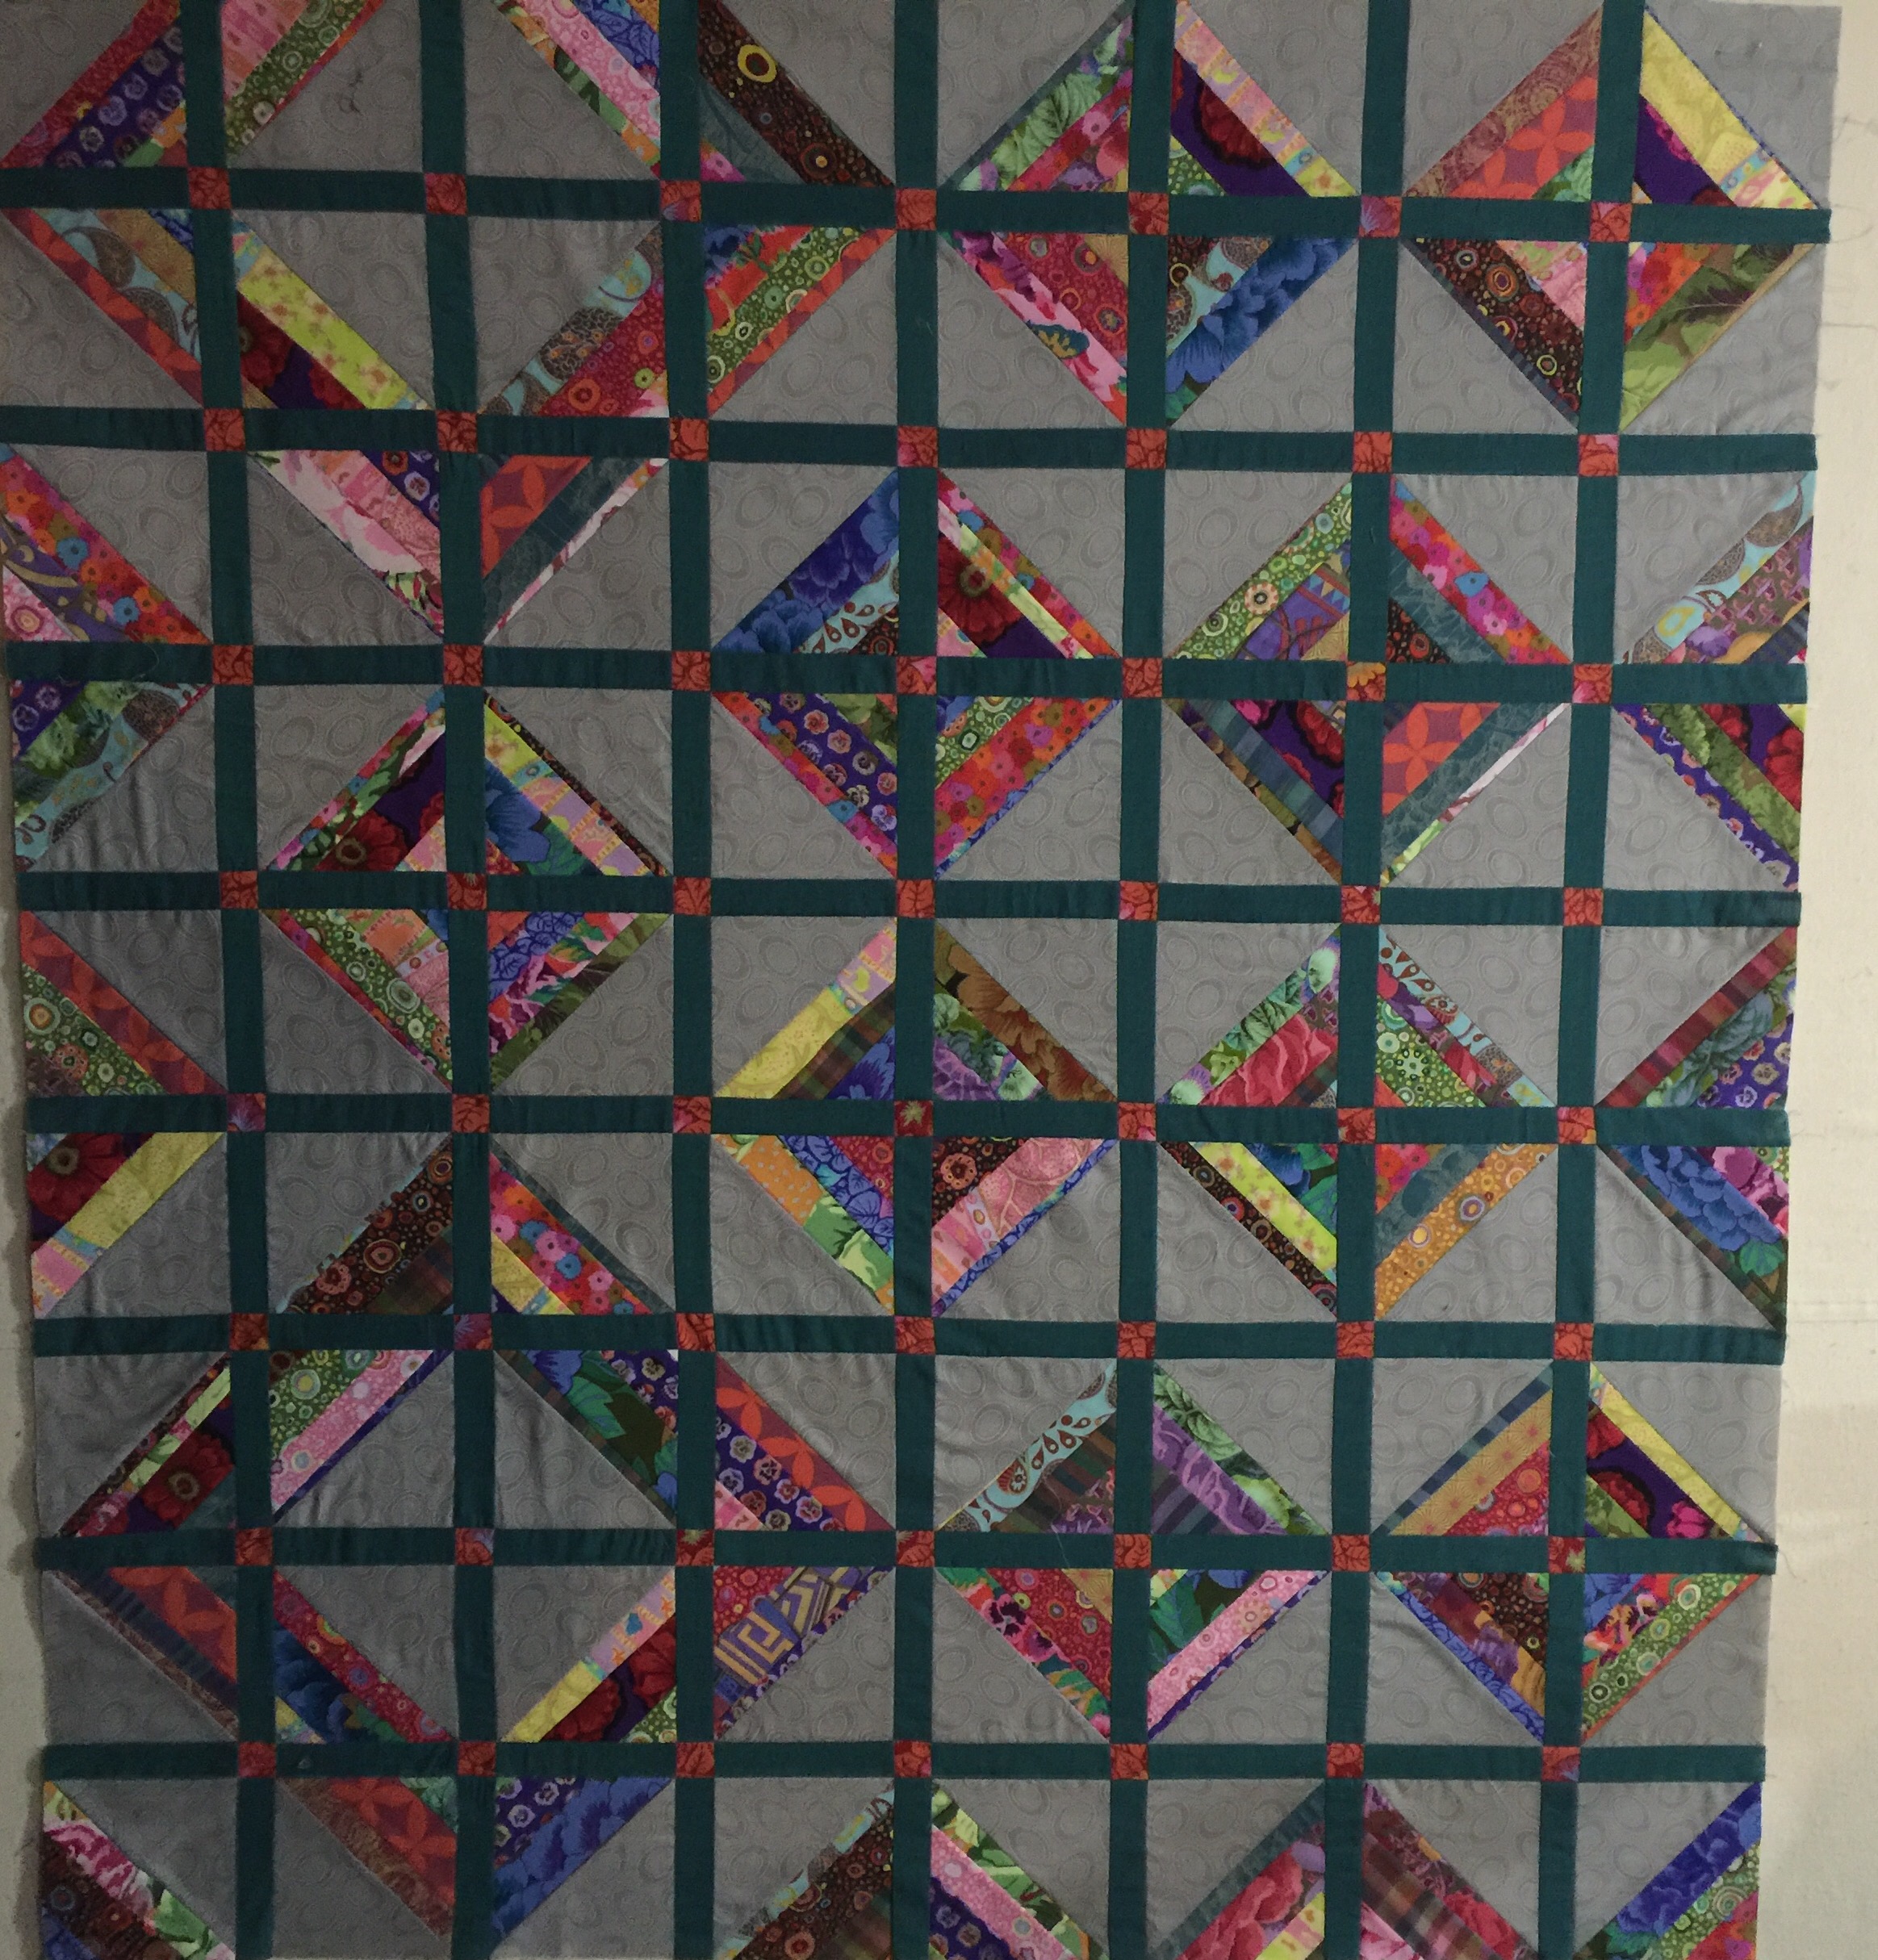
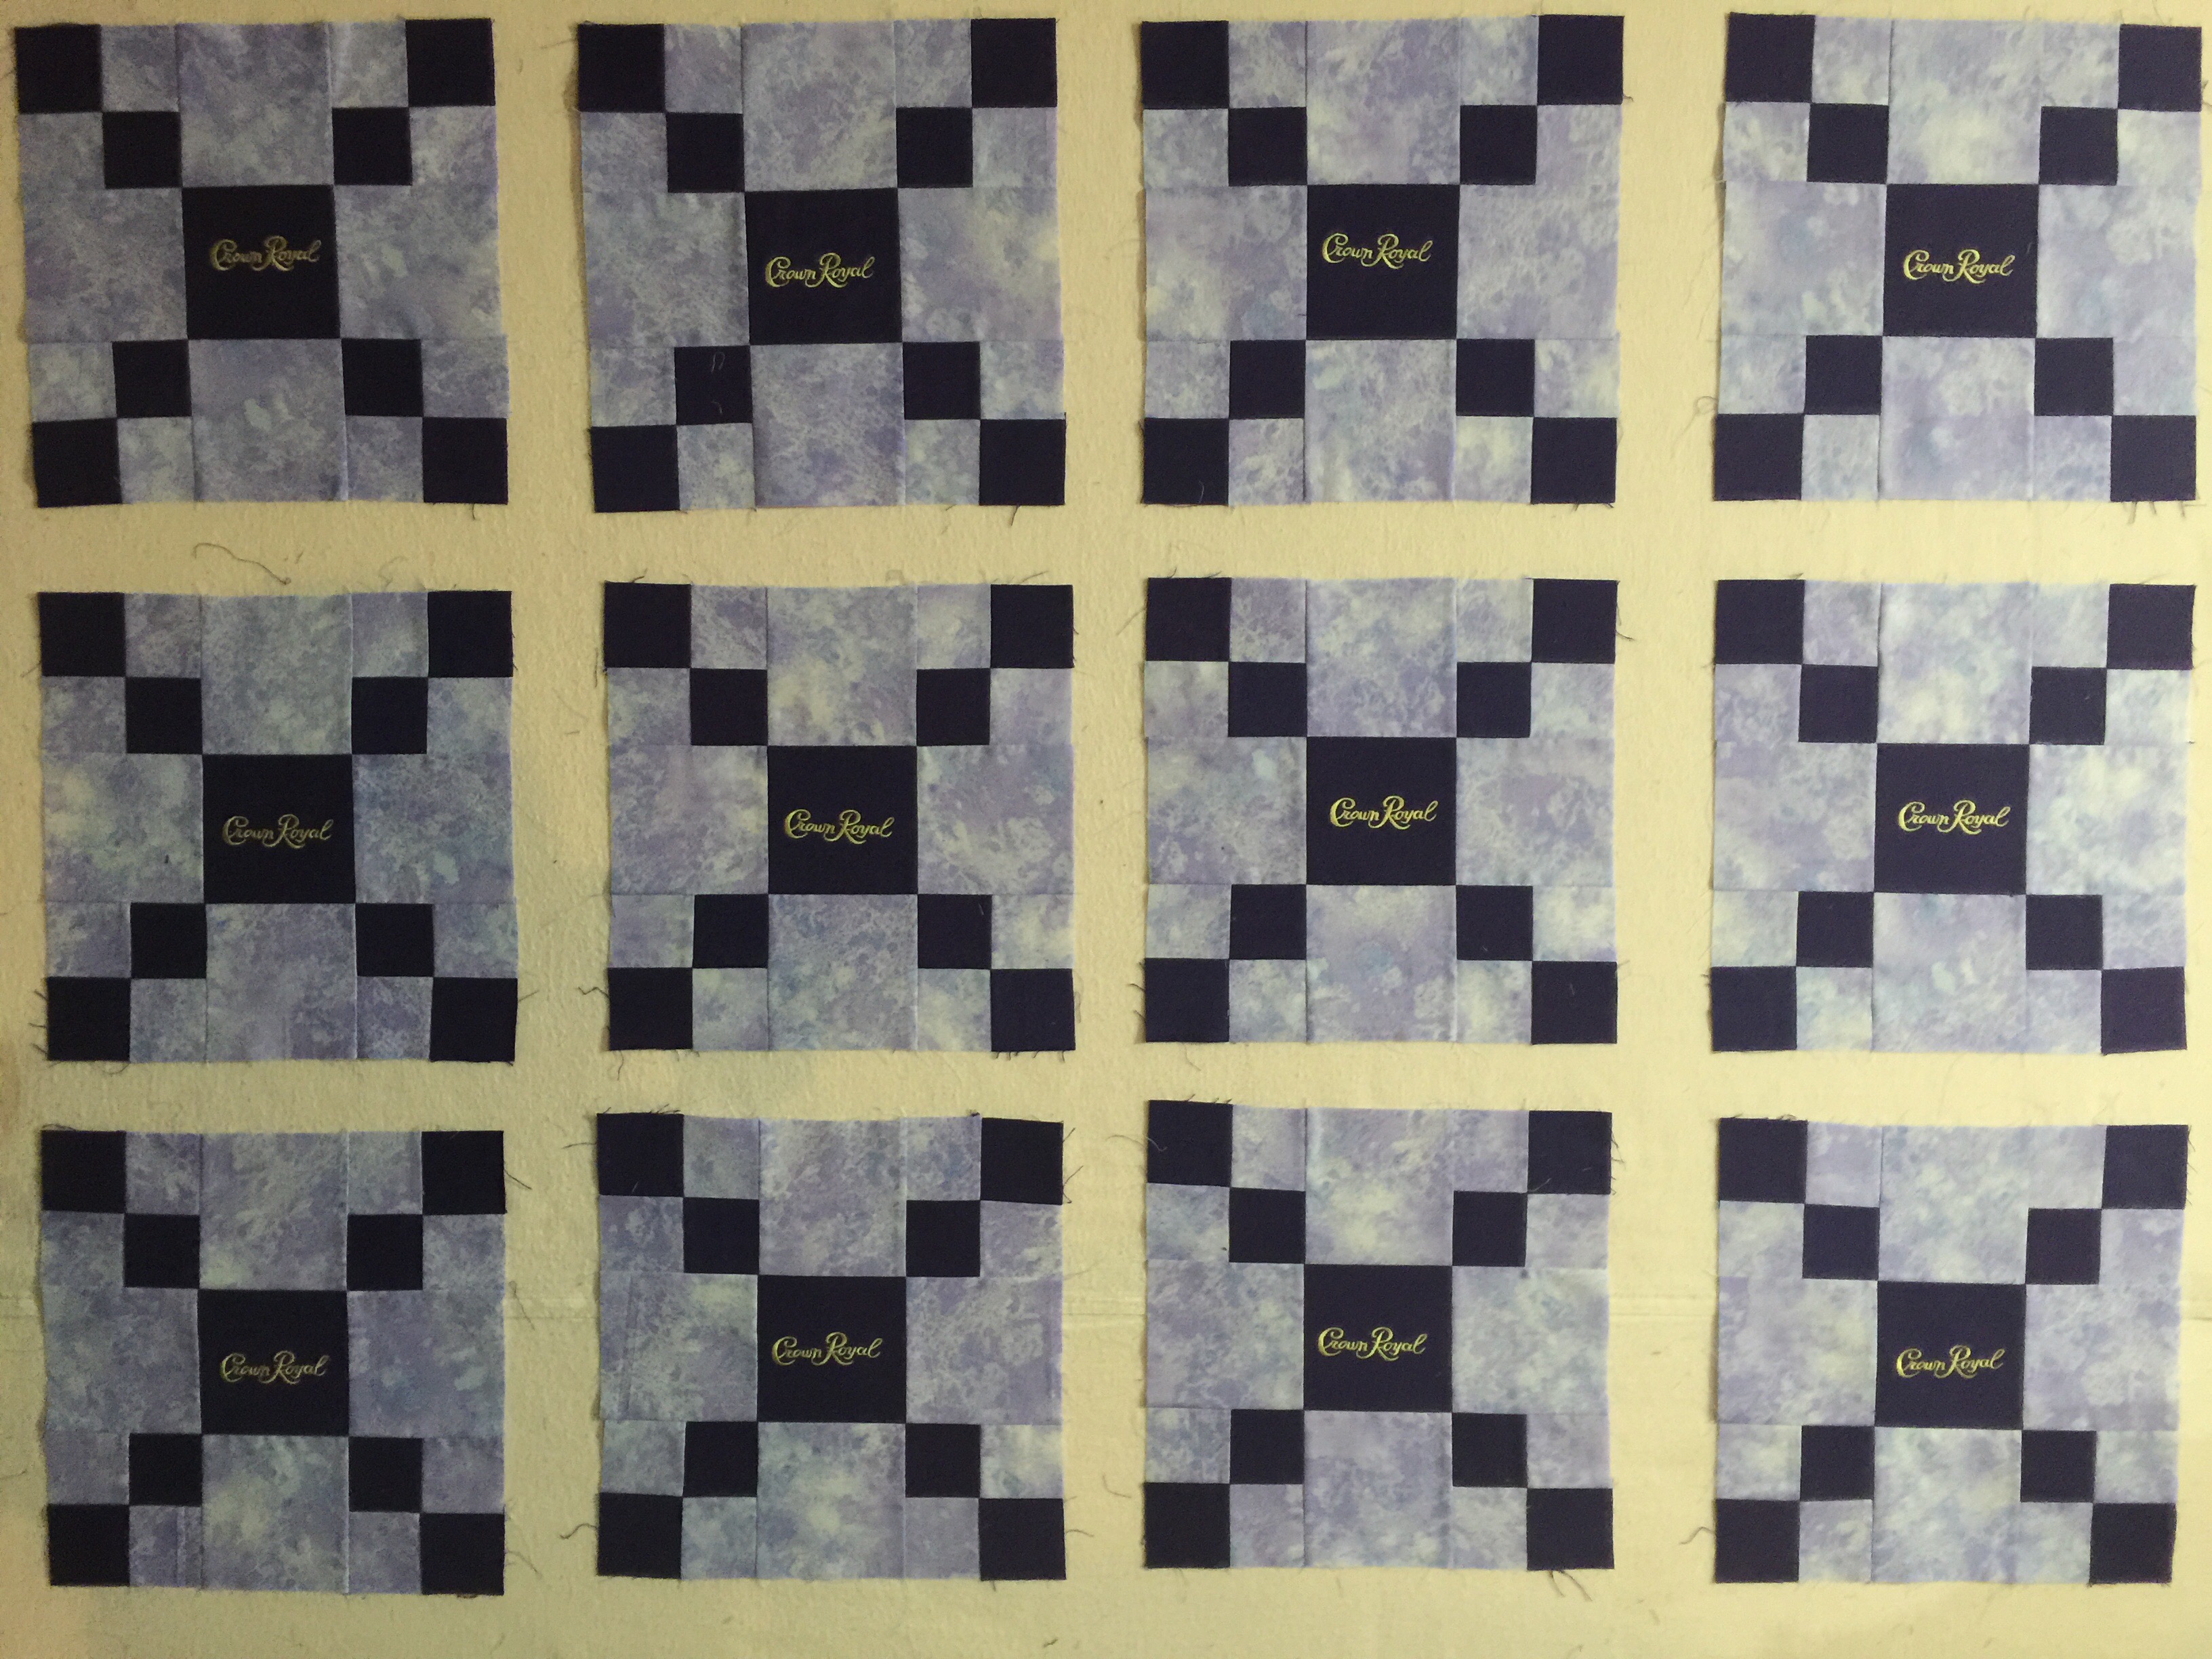
Crown Royal quilt

I finished sewing the crown royal quilt top. Yea! The quilt top measures 110″x 110″. It outgrew my design wall so I had to wait for a good weather day and lay it outside to get a picture of the whole top.

My son wanted it to be a king size quilt so I needed a quick easy block. Making a simple 12″ 9 patch block with 4 patch blocks in the corners, then a 3.5″ sashing and cornerstones did the trick! Next step is to get it quilted and bound. 👍🏻

Have you made a crown royal quilt? Or collecting bags to make one?

Theresa

Our youngest quilter

Each year Sharon and I hold our mystery lock in. We have quilters of all ages and skill levels attend. It’s a fun day for all! Two years ago, Hannah (age 11) came and sewed with her granny for a while. She enjoyed her time and told her granny that she wanted to come back the next year and do the mystery quilt.  Her granny decided to sign her up and Hannah was then our youngest paid attendee at 12 years of age! When the time came, she picked her fabrics and started sewing her quilt. She sewed on her quilt that day and enjoyed her time with all the other ladies that attended. Her granny told her that she’d have to finish last years mystery in order to do next years mystery quilt so she  went to granny’s house yesterday and finished sewing her quilt!  Hannah (age 13) 

Her 2016 mystery quilt, Knotty Times,  is now complete and ready to be quilted!

What a great job Hannah did in picking out her fabrics and sewing them together!!! I’m looking forward to seeing what she makes next year! 

Here’s her granny’s quilt.

Both quilts are great! It’s so fun to see quilters of all ages come together and have such a great time! Hannah and Doris, both quilts are beautiful! Thanks for joining us at our lock in and sharing your work!! 

The pattern Knotty Times can be found on our Etsy and Crafsty stores.

Theresa

Glue basting video

Back in May I had the opportunity to attend spring quit market in Salt Lake City. I was a bit overwhelmed but had a blast!! While I was there in the Martingale booth giving a demo, they video taped the technique and it’s now available to see how easy it is.

For the demo I had to make small strips strips but just imagine that sashing strip being 50+inches long. Glue all your sashings and then chain sew all of them at one time. Fast!

Have you tried gluing instead of pinning?

Theresa

Design wall 10/17/16 string blocks

I decided a while back to use some Kaffe fabrics for a string quilt. The quilt I made had some leftover blocks so I played around with them and decided on this layout. I added sashings and cornerstones, now it’s time for borders.


I’m planning to use more of the orange fabric for a small border then use another Kaffe print for the outside border.

That’s what’s on my wall today. To see more walls check out www.patchworktimes.com

Theresa

I’m a gluer….😀

I know some people are against using glue in the construction of thier quilts, but I am “not” one of those people. I love how easy it is to glue the pieces together and then just sit down at the sewing machine and sew.  I’ve been working on the crown royal blocks, which has really gone together quick! I like doing things that are quick, that way I can get more things done.

I thought I would share a bit of the glueing process with you today. I had all the blocks made and there is a sashing strip that goes in between each block. I sewed a sashing strip onto the right side of each block (the first block has a sashing on both sides).  Here’s where using the glue really speeds up the process.

Starting with the first block, I glued the blocks together one by one, making sure they were in the correct order. After glueing the first 2 blocks together, I would fold up the block on top and then with rights sides together, glue the next block on and repeat that process until all blocks were glued together.


I then picked up the stack and moved  to the sewing machine.

Keeping the blocks stacked, I started sewing.


When I reached the end of the first block, I chain pieced to the next block.

I continued to keep them stacked while chain piecing the blocks.

When I finished the last block, all I had to do was clip the threads between the blocks…….

Tadah! Row is complete. No blocks accedentally turned, no pins to fuss with or get poked by. Only took a few minutes to have all the blocks sewn into rows.

That’s it for now. Next step will be to glue the sashings onto each row and then take my pile of rows to the sewing machine and chain piece them. Yep, I like using glue!😳

Theresa

Design wall 10/3/16 Crown Royal blocks

I’m slowly making progress on the blocks. I sew a little on them when I get time. I have 24 sewn and I need 36 blocks for the quilt, so I’m more than halfway done with making the blocks. I have the sashings and cornerstones all cut and ready to go, so hopefully I can get the blocks finished soon and move on to assembling the quilt top. 😀


It’s going to outgrow my design wall soon. But for today, that’s my wall. To see more walls check out http://www.patchworktimes.com

Theresa